
How to connect a Desktop VoIP Phone to the Ozeki Phone System XE
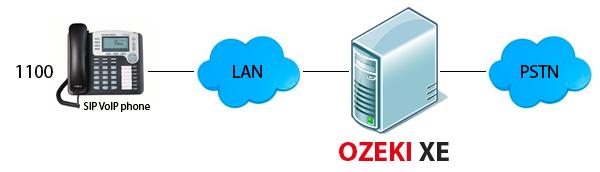
Due to its great flexibility, the Ozeki Phone System XE enables to connect desktop and mobile phones as well to your PBX. This guide focuses on VoIP desktop phones and describes what you need and how you should configure your desktop IP phone in order to integrate it into your telecommunication network. To achieve this objective, you need a desktop IP phone (such as Grandstream GXP2000 in our example) and an Ozeki Phone System XE installed on your Windows PC.
Do you need a Mobile Extension? Click here
| Video tutorial: | How to connect a Desktop VoIP Phone to the Ozeki Phone System XE |
What you should do to create a connection
 | Step 1: Create a SIP account in Ozeki XE Step 2: Configure your Desktop Phone Step 3: Make a test call |
Step 1: Create a SIP account in Ozeki XE
First and foremost, you need to install the Ozeki Phone System XE. (If you need assistance in connection with the download process, installation and product activation, please visit the following page: Quick Start Guide. Here you can find a detailed step-by-step installation guide about the first steps.) After installation you need to launch the software.
After starting the software, the login screen will appear automatically on the WebGUI. In order to login you need to enter your username and password then click on the 'Login' button (Figure 1).

Figure 1 - Logging after installation
When you have provided your login details, you need to click on 'Install new' button in the top right-hand corner of the greenish yellow 'Extensions panel' (Figure 2).
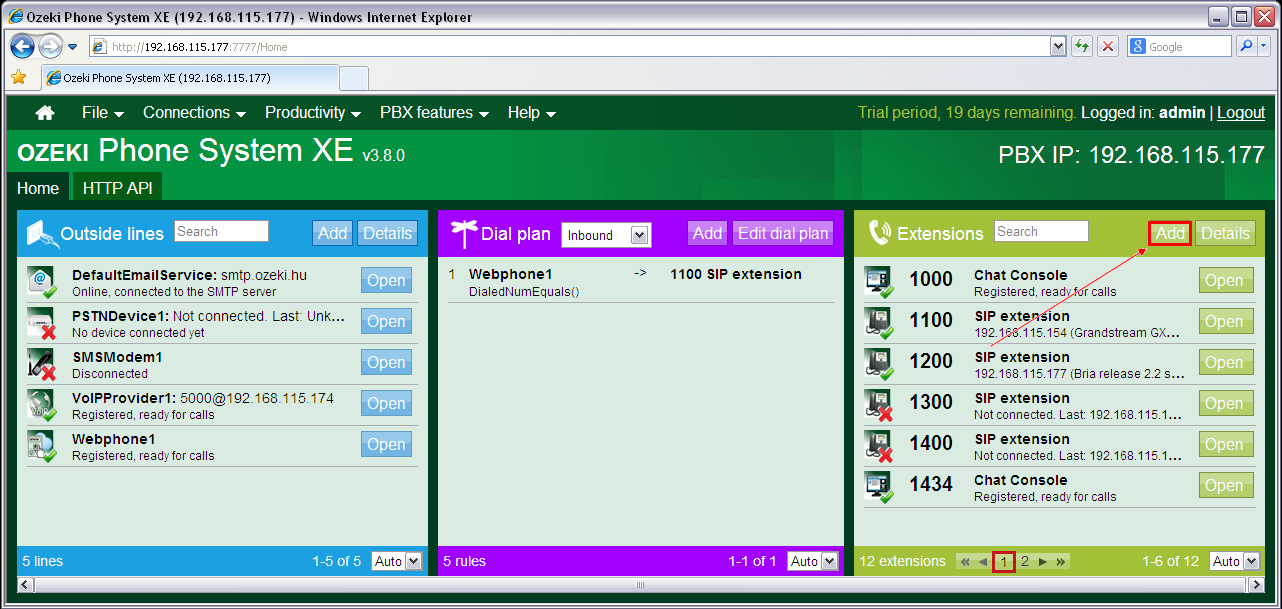
Figure 2 - Ozeki Phone System XE home screen
Now, the "Extensions" panel can be seen. Look for the "SIP extension" line in the Standard Extensions column then click on the 'Install' button (Figure 3).
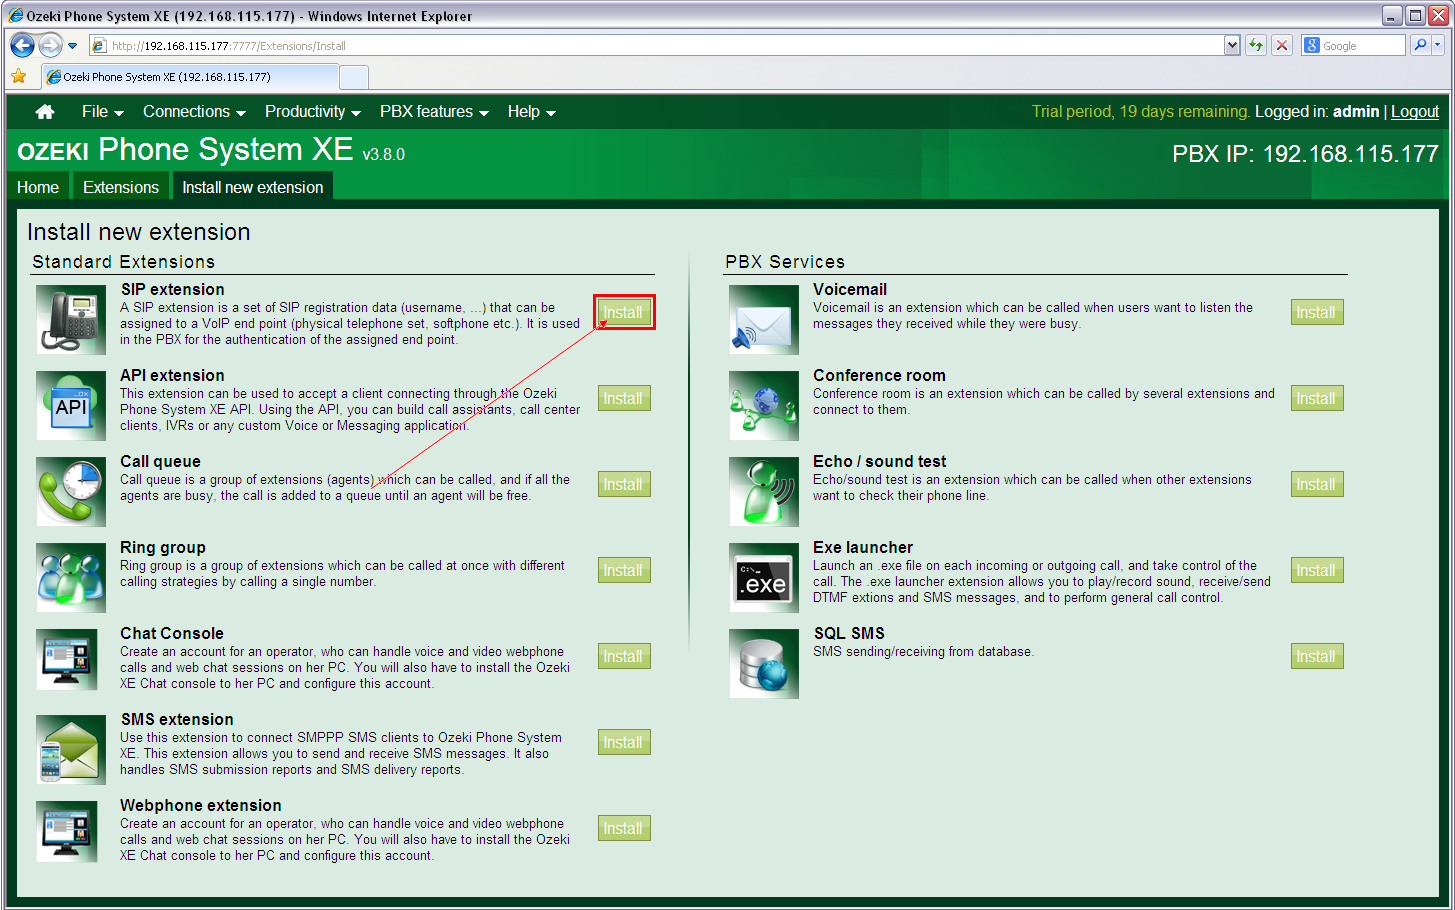
Figure 3 - Install a SIP extension
Clicking on that button, a Configuration will appear, where you can specify the SIP account details to use for this extension: Extension phone number (optional), Authentication name (obligatory) and password (obligatory) (Figure 4). After providing this data, click on "OK" button.
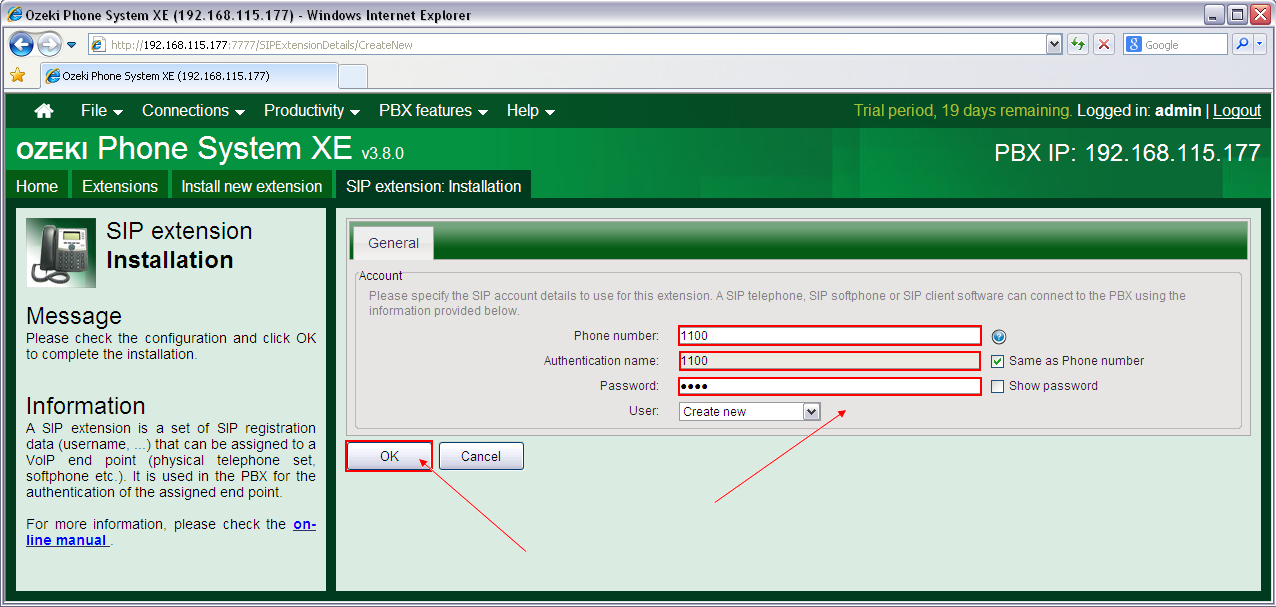
Figure 4 - The configuration panel of the new SIP extension
Having done these steps, you need to connect your Desktop VoIP Phone to your communication system. (In this guide we demonstrate the required configuration steps using a Grandstream GXP2000 device, but the steps are the same for another device as well.)
Step 2: Configure your Desktop VoIP Phone
After you have connected your phone to the VoIP network with the proper cables, the system will assign an individual IP address to the phone by using DHCP. If you use a Grandstream GXP2000 desktop VoIP phone, the IP address can be easily read at the display of the device (Figure 5). If you use another type of desktop phone, you may find it in the menu system of the telephone.
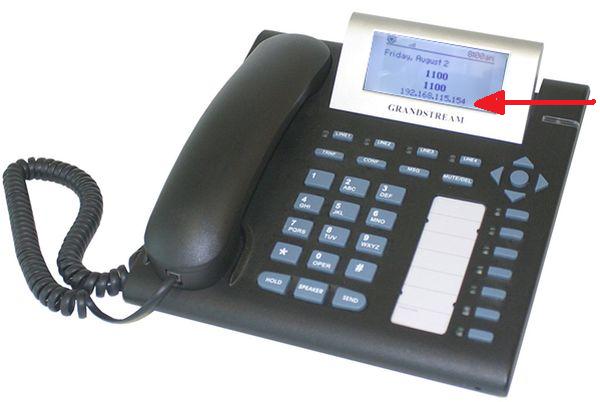
Figure 5 - IP address on a Grandstream GXP2000 desktop VoIP phone
For configuring your desktop phone, you need to open the configuration page of the phone by typing its IP address into your web browser. (In case of Grandstream GXP2000, you need to click on 'Account 1' for configuring the extension onto the Line 1.) On the configuration panel you need to specify the following information (Figure 6):
- Account Active: Yes
- Account Name: e.g. YourCompany
- SIP Server: the IP address of your Ozeki Phone System XE
- SIP User ID: the user part of an SIP address
- Authenticate ID: can be same or different from SIP User ID
- Authenticate Password: optional
- Name: optional, e.g. John Sample

Figure 6 - Configuring a Desktop Phone (Grandstream GXP2000)
If you use another kind of desktop phone, you also need to specify a Display name, Username (Extension phone number), Password, Authentication name and the IP address of the Ozeki Phone System XE.
After specifying the SIP details, click on the 'Update' button at the bottom of the page. The phone will be booted. When it is ready, click on the 'Reboot' button.
Now return to the Ozeki Phone System XE and click on the Log button. The 'Registration accepted' message will appear, if your configuration was successful (Figure 6).
Step 3: Make a test call
In order to make a call, dial the phone number of your new extension by using an other extension of your VoIP network. (In our example the No. 1200 extension dialled the new No. 1100 Desktop VoIP Phone extension.) Figure 7 shows that the whole call process can be tracked in the Log panel of your extension. 'Incoming call received' message indicates that an incoming call is in progress. 'Call established' message shows that the incoming call has been answered. After finishing the call, the 'Call completed' message will appear.

Figure 7 - Test call log
Conclusion
The guide above presented that Desktop VoIP Phones can be easily connected to the Ozeki Phone System XE. If you follow that step-by-step, you will be able to install a new SIP extension in the PBX and configure your phone on its web GUI quickly. That's it. After that, your phone will be ready to use.
If you have any questions or need assistance, please contact us at info@ozekiphone.com


