The Microsoft Azure cloud operating system can be connected to your network by way of a virtual private network or VPN. Azure lists some supported devices and provides configuration scripts for them, but does not include the Draytek range of devices. Draytek devices are common in the small business market and for techy home users. This blog post will show how to configure a site to site VPN between your network and your Azure tenant using a Draytek 2920 router. Other Draytek routers will work as well, just the screenshots and instructions here are from that model of router.
Before you start you need the following information to hand:
- The IP subnets of your network. For the purposes of this blog these are 192.168.5.0/24 and 192.168.6.0/24
- The IP subnet that you wish to use in Azure. This needs to be different from the subnet(s) on your LAN. For the purpose of this blog this will be 192.168.4.0/24.
To configure your VPN login to your Azure tenant at https://manage.windowsazure.com/ and from the services area on the left click Networks near the bottom. Add a new network by clicking Create a virtual network or from the bottom toolbar clicking + New and from the options select Custom Create. Note that Quick Create will not create a valid solution as it will note create a VPN gateway.
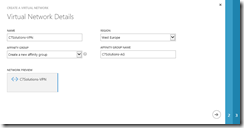
Enter the name of the VPN network and enter a name for the affinity group that you need to create. You will place virtual machines into this affinity group so that they get an IP address valid for this network. I’m based in the UK, so I choose West Europe (i.e. Dublin) as the datacentre to use.
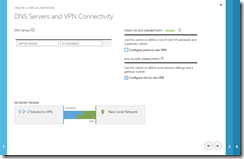
Click the right-hand arrow at the bottom of the screen and check Site to site VPN. You only need to add a DNS name and IP address (to an existing DNS server) on your LAN if your virtual machines need to use this DNS server to resolve on-premises resources. I will use Azure to do my name resolution, so will not enter them here.
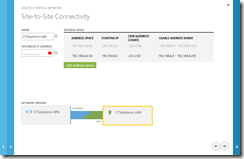
Click the right-hand arrow at the bottom of the screen and enter a name for your LAN and your external IP address (not shown here). This needs to be a static IP address that is not NAT’ed, so in my case this will be the external IP address of the Draytek router. Also enter the address space(s) for your LAN.
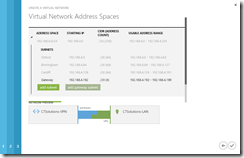
Click the right-hand arrow at the bottom of the screen to go to page 4 of the wizard and select an address space that does not conflict with your LAN address spaces entered on the previous screen. In the picture below I have configured 192.168.4.0 as the subnet with a /24 CIDR range. You can edit the values provided if they do not suit. For the subnets within this network, you need one or more subnets for the address space. My final aim for the Azure tenant is to host a multisite Exchange Server lab, so I will create four subnets within the 192.168.4.0/24 address space. The first address space is going to be reserved for routing purposes back to my LAN. The routing subnet is configured by clicking the add gateway subnet button.
Click the tick mark and wait for the network to be created. Once created click the network name and then Dashboard.
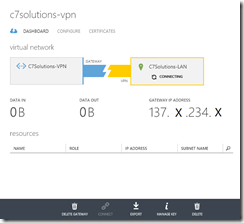
You will see that the gateway is not created. To start the VPN gateway at Azure click theCreate Gateway button on the lower black toolbar. Choose Static Routing and confirm the choice. In about 15 minutes time the status of the gateway will go blue and the VPN grey.
We can now move onto configuring the router on your LAN as Azure is now waiting for the connection to take place.
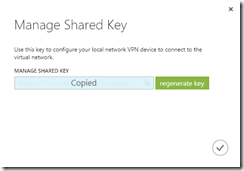
On the VPN page in Azure you will see the status of the connection showing the amount of data that has crossed the connection to date and the IP address that you need to connect your VPN tunnel to. Make a note of this IP address (redacted in the above picture) and also make a note of the Shared Key, this you can get from the Manged Key button on the toolbar. Copy this to your clipboard and navigate to your Draytek admin page.
Ensure that your router provides service for IPSec VPN’s and that this type of traffic is not being passed through the router to another device. This is available from VPN and Remote Access > Remote Access Control in the Draytek web admin pages.
Change to VPN and Remote Access > LAN to LAN and click an available LAN to LAN profile that is not being used. In section 1 give the profile a suitable name and enable it, disable Netbios naming packets from crossing the VPN and allow multicast if you will need it. Set the Call Direction to Dial-Out and check the Always on option if you require the connection to be up all the time. Scheduled connections are also possible.
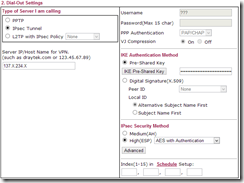
Under Dial-Out Settings (section 2) ensure IPSec Tunnel is selected and the Server IP/Host Name for VPN matches the Gateway IP Address provided on the Azure management page. Under IKE Authentication ensure Pre-Shared Key is selected. Click the IKE Pre-Shared Keybutton and paste the pre-shared key from Azure.
Under IPSec Security Method select High (ESP) and ensure AES with Authentication is selected. Azure requires AES encryption. The Advanced options do not need changing as they are valid for Azure already.
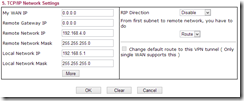
Scroll down to section 5 (sections 3 and 4 do not need completing) and enter the network address space in use at Azure as the value for Remote Network IP and ensure the Remote Network Mask value is correct. This ensures that connections to this subnet are routed down this VPN tunnel. If you have multiple address spaces created at Azure then click the More button and add the rest of the Azure networks (not the individual subnets within the address space) if you added additional address spaces.
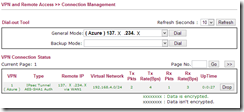
Save the VPN profile and navigate to VPN and Remote Access > Connection Management. In about 10 seconds you will see this page refresh and you should see the connection to Azure has been made.
Back on the Azure management console the VPN at the LAN side should be green and the Data In and Data Out values increasing. At the time of writing, an Azure VPN costs £1.44 per day and this does not include any network traffic across the link.
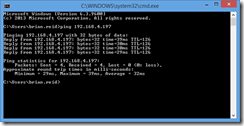
Ensure that your link is up by pinging the VPN endpoint at Azure. This will be the second IP address on the gateway subnet that was created earlier. In my example this is 192.168.4.197.
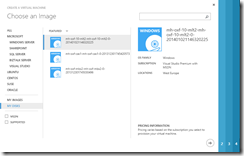
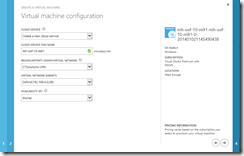
Virtual machines in Azure will get an IP address from your VPN and will be directly reachable to and from your LAN if they are associated with the VPN network created when the VPN was created. To do this either create a virtual machine from the gallery option (not Quick Create) to make a new virtual machine from a template or one of your existing unused VHDs or images and set the region/affinity group to the VPN network.
Note that you cannot change the network that an existing machine is associated with – you need to delete the virtual machine (but without deleting the disks) and also delete the associated cloud service. Then you can make the VM again and choose My Disks from the gallery and select the VPN as the Region/Affinity Group/Virtual Network value.
That is it. You virtual machines will come online and be provisioned and get an IP address on your virtual network. To see the IP address click the virtual machine and view the dashboard. Note that shutting down the virtual machine will release the IP and you cannot assign static IP’s in Azure or the machine will not be reachable – all connectivity to Azure machines is via resolved names.

