
How to Use Access Point Devices Management on Vigor2860? —An Example with Two VigorAP800
Access Point Devices management features in managing wired AP devices directly on the router. Vigor2860 is able to manage at most 20 APs simultaneously.
This document describes how to use this Access Point Devices on Vigor2860 to manage AP800s, and following is the Network Topology.

Part A. Detecting AP800s on Vigor2860
Please log into the router administrator page, which IP address is "192.168.1.1" in this note.
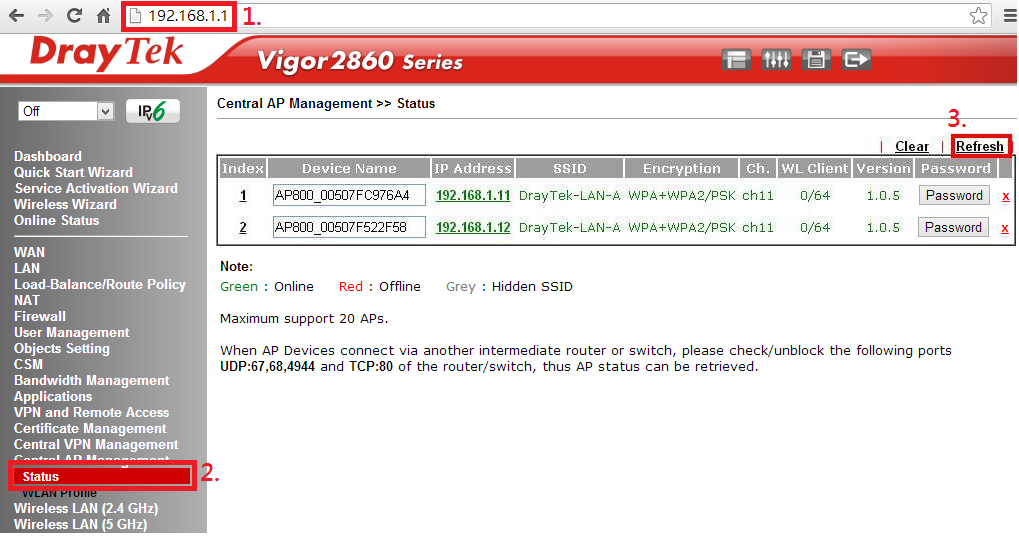
- Browse to 192.168.1.1, and log in as the administrator.
- Go to Central AP Management >> Status
- The list of detected AP800s will be shown. Please click Refresh if the devices are not listed out completely.
Note:
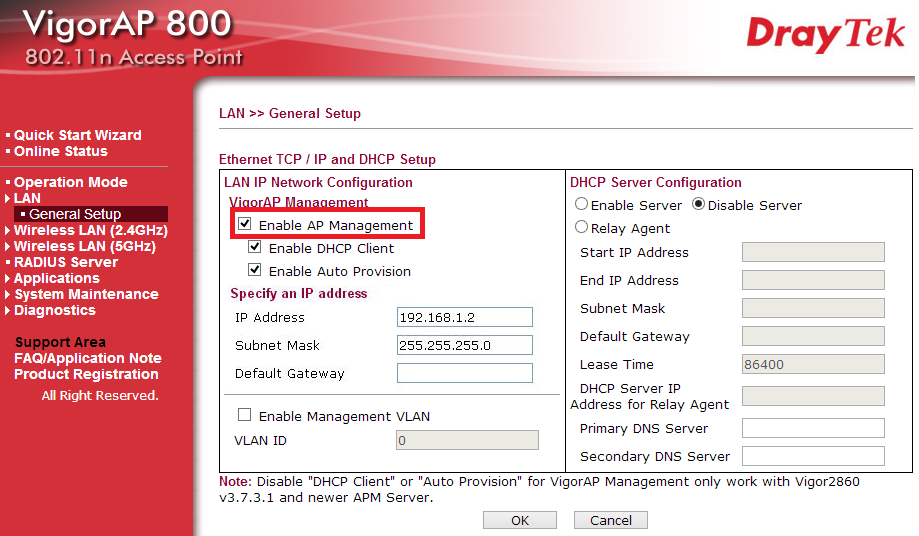
- AP800s are required to be wired to Vigor2860.
- On AP800, it's necessary to Enable Client for VigorAP Management.
Part B. Editing the WLAN Profiles for APs
Note: In this note we will edit 2 profiles.
Step 1. Setting up the 1st AP Device

- Choose Central AP Management>>WLAN Profile.
- Tick to choose the profile.
- Click Edit.
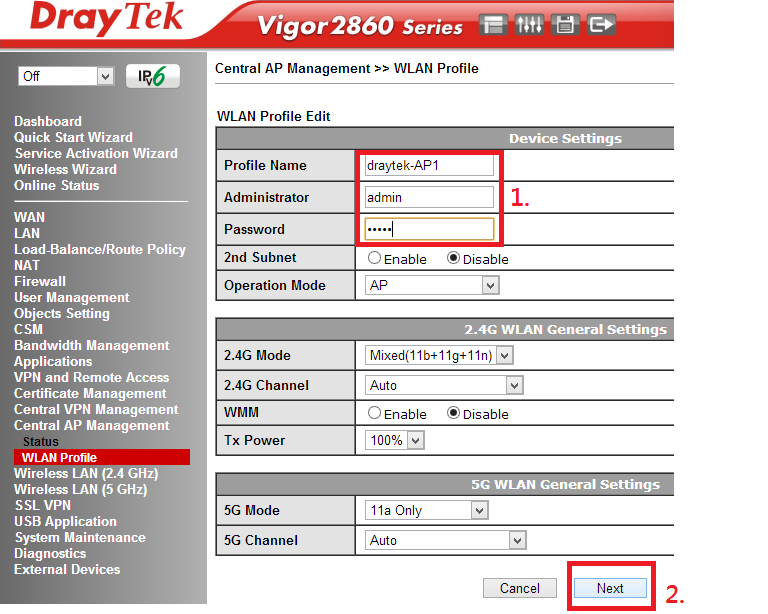
- Edit the Profile Name, Administrator and Password.
- Click Next to continue.

- Enable SSID1.
- Name the SSID.
- Choose the encryption mode.
- Edit the Pass Phrase.
- Press the Next Botton.
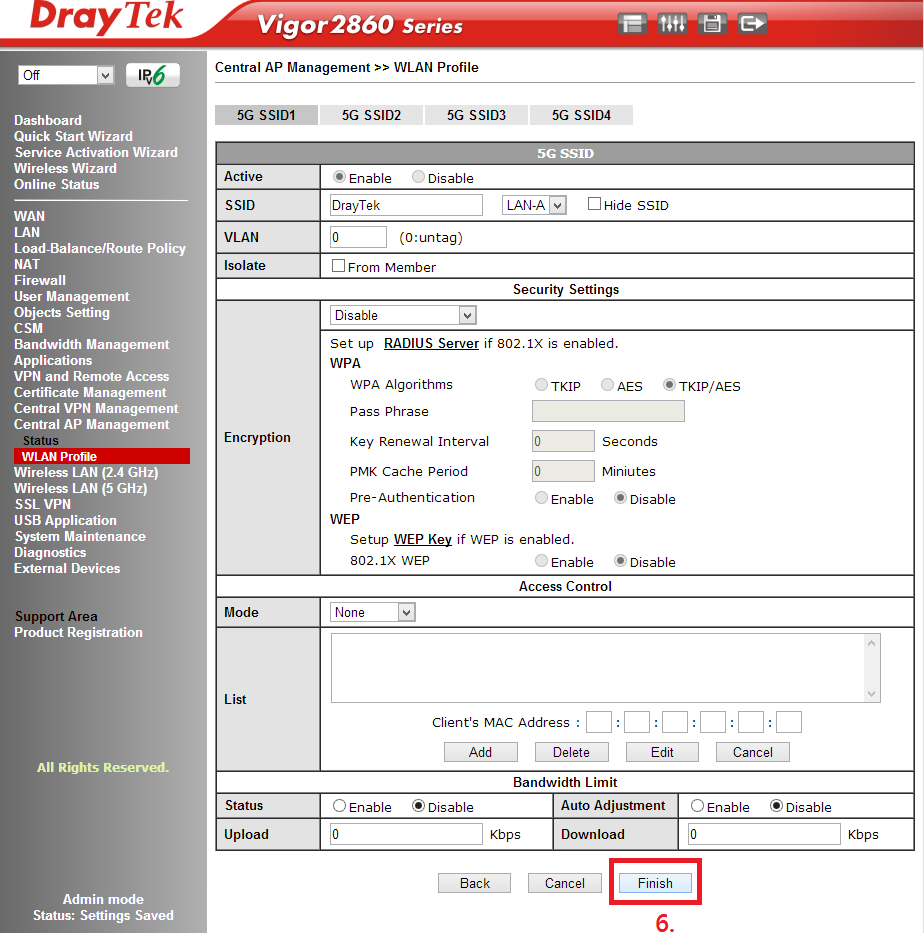
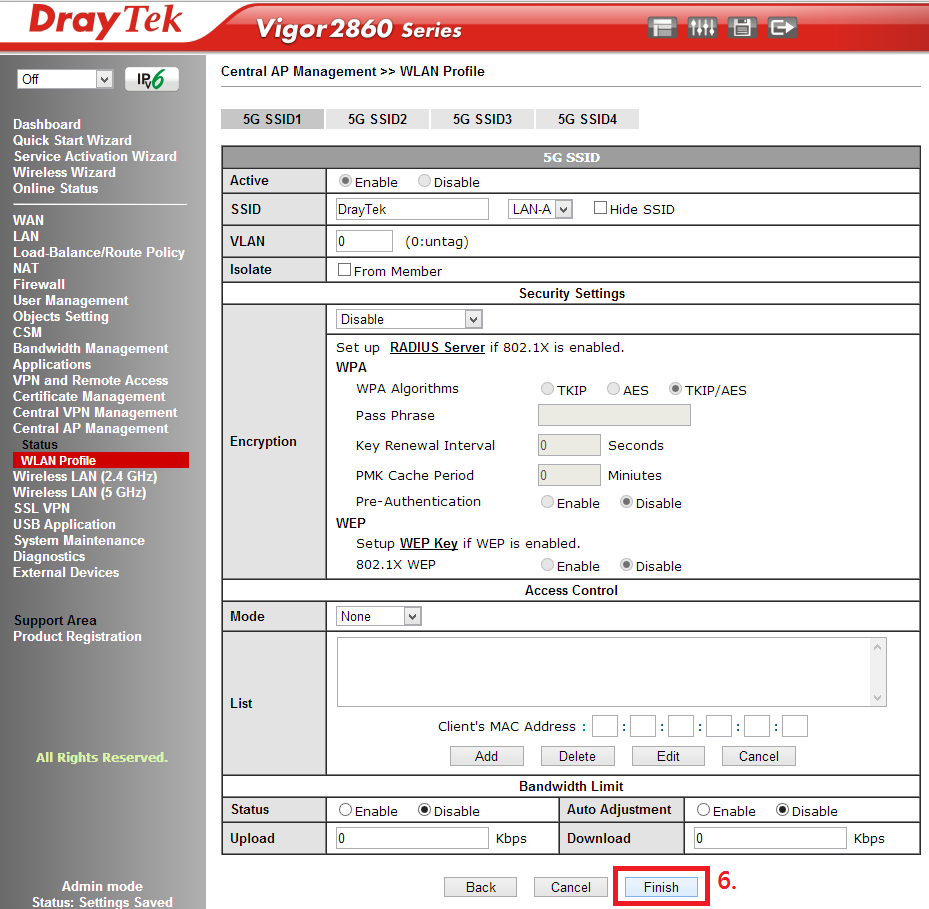
6. You will see this page, please press Finish button to complete the whole setting.
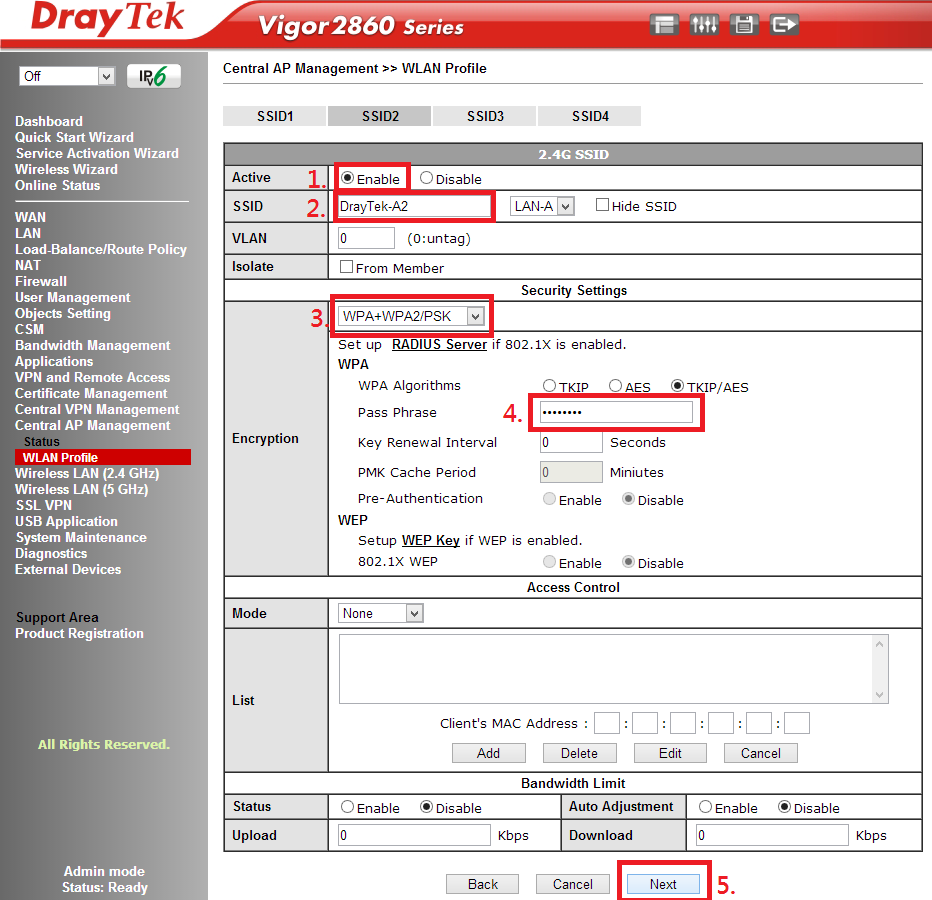
- Enable SSID2.
- Name the SSID, which is necessary to be different from SSID1.
- Choose the encryption mode.
- Edit the Pass Phrase.
- Press the Next button.
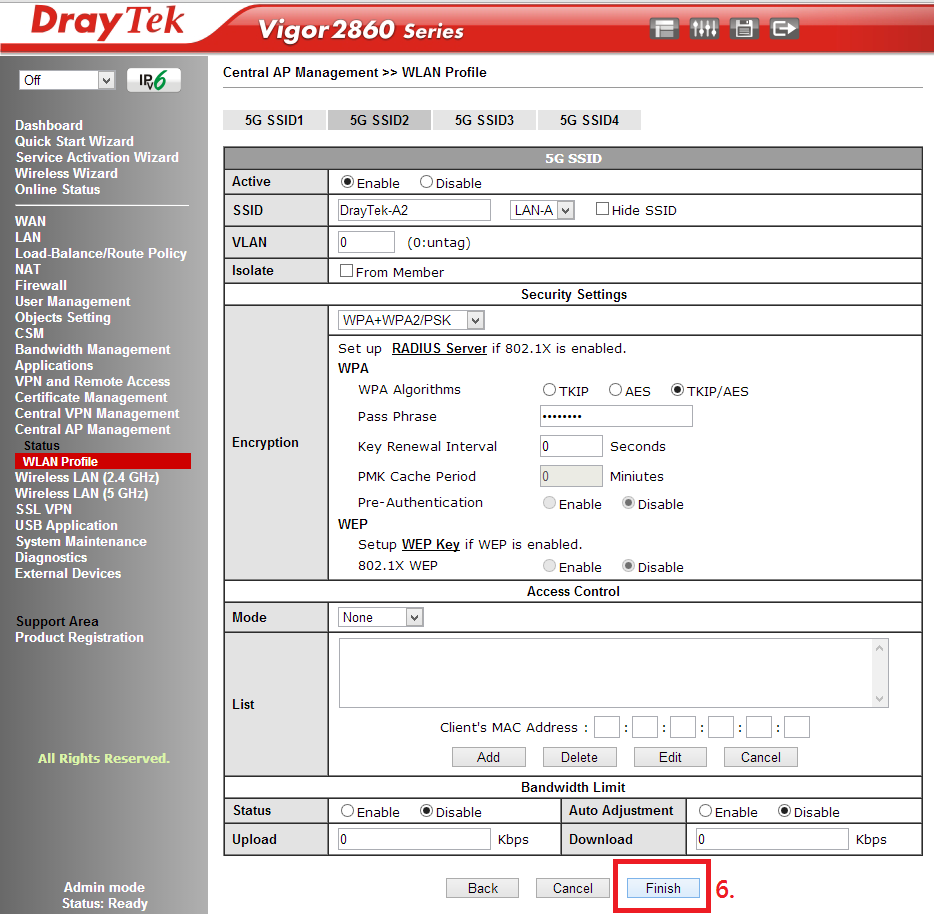
6. You will see this page. Please press the Finish button to complete the whole setting.
Step 2. Setting up the 2nd AP Device
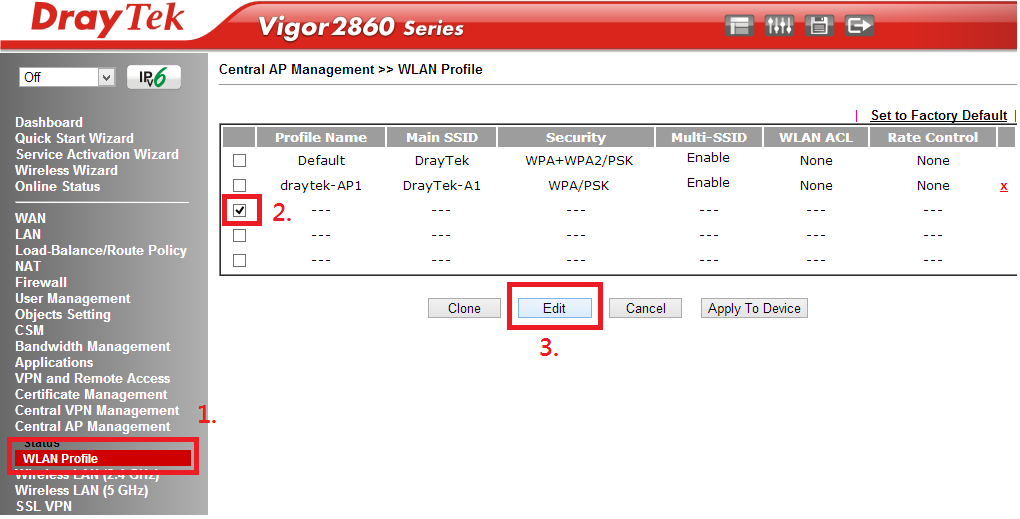
- Choose Central AP Management >> WLAN Profile.
- Tick to choose the profile.
- Click Edit.
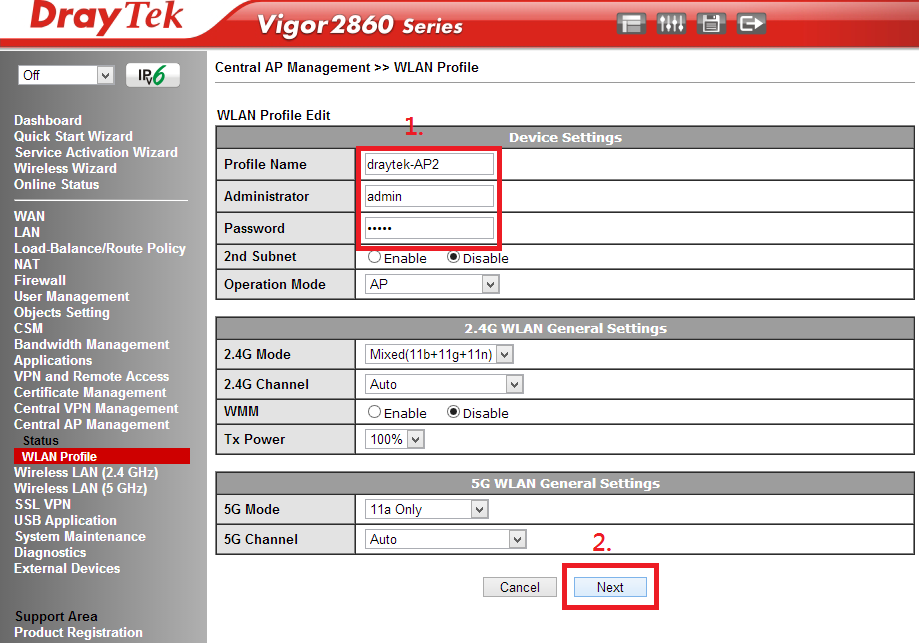
- Edit the Profile Name, Administrator and Password. The profile name is necessary to be different from it of device 1.
- Click Next to continue.

- Enable SSID1.
- Name the SSID.
- Choose the encryption mode.
- Edit the Pass Phrase.
- Press the Next button.
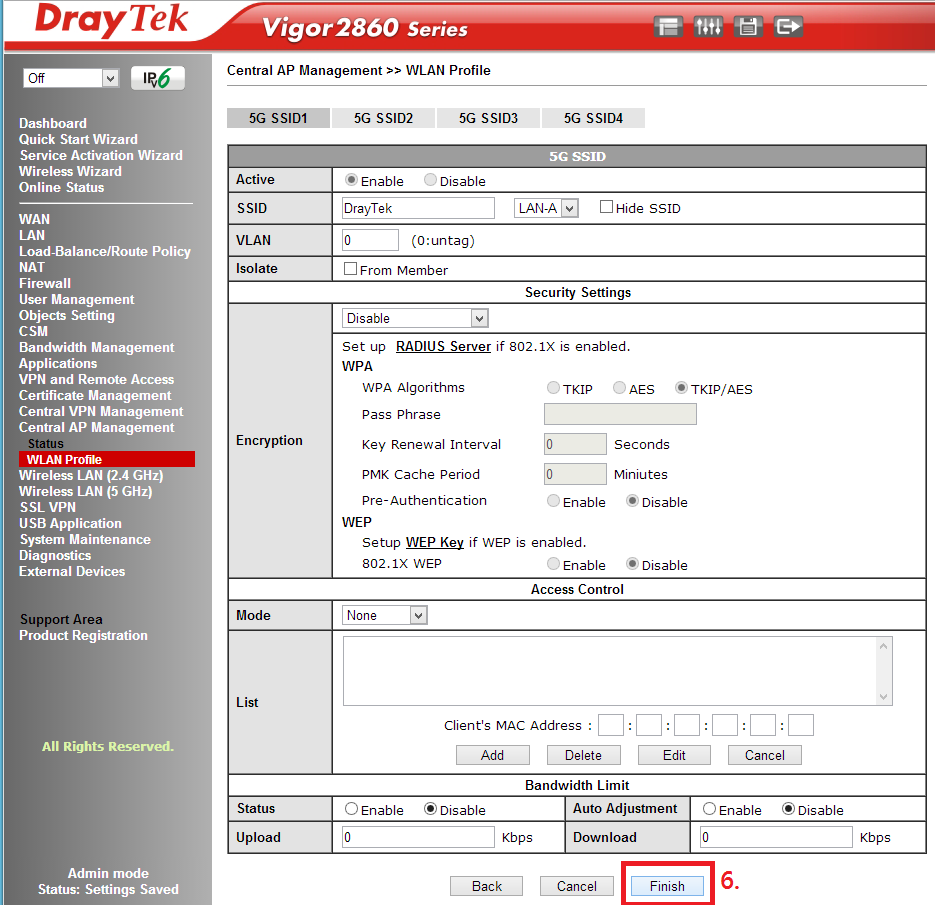
6. You will see this page. Please press the Finish button to complete the whole setting.
Part3: Applying settings to the APs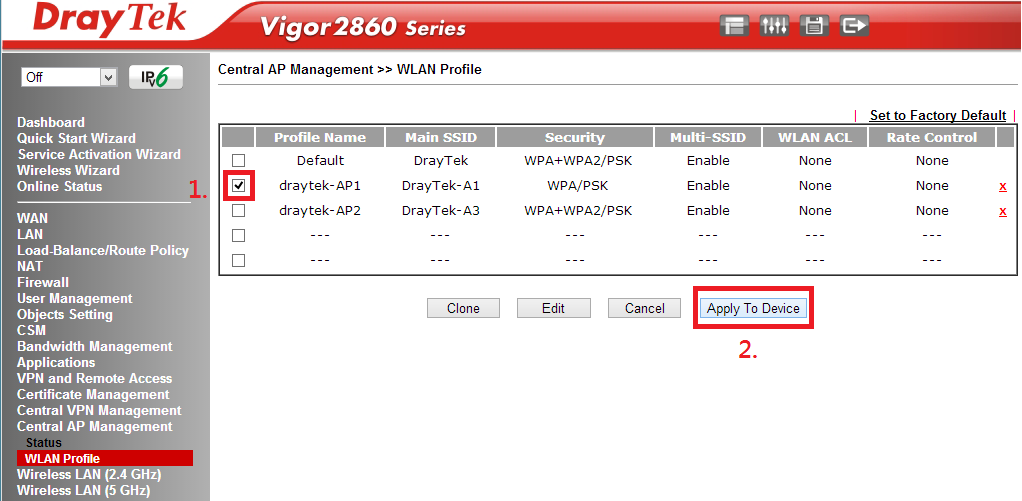
- In WLAN Profile, chose the profile.
- Click Apply to Device.
6. You will see this page. Please press the Finish button to complete the whole setting.
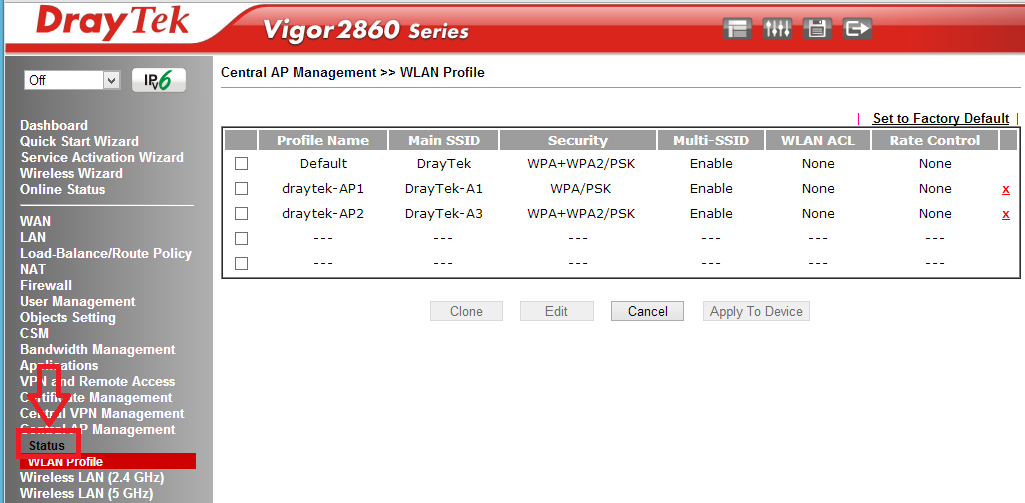
Now, let's check the Status after applying. Please click Status.
To check if the setting has been applied successfully, please click the IP Address, and a new window will be shown.

The SSID General information should be set properly:
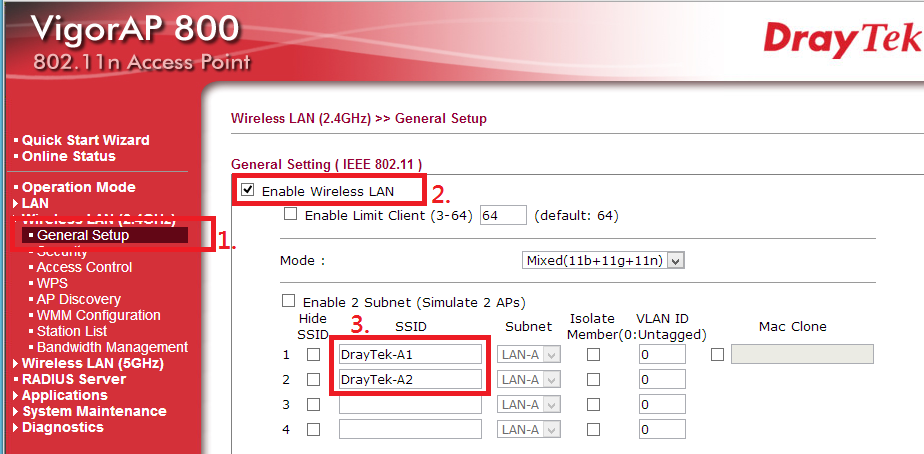
- Go to Wireless LAN (2.4GHz) >> General Setup.
- Enable Wireless LAN.
- Check the SSIDs.
And the Security information should also be set well:

- Go to Wireless LAN>>Security Settings.
- Check SSID 1 and SSID 2 separately.
Also, we may check the 2nd AP by clicking on the IP Address 192.168.1.12.

The SSID General information should be set properly:

- Go to Wireless LAN>>General Setup.
- Enable Wireless LAN.
- Check the SSIDs.
And the Security information should also be set well:
- Go to Wireless LAN>>Security Settings.
- Check SSID 1 and SSID 2 separately.


